December 16, 2013
Rack Attack Team
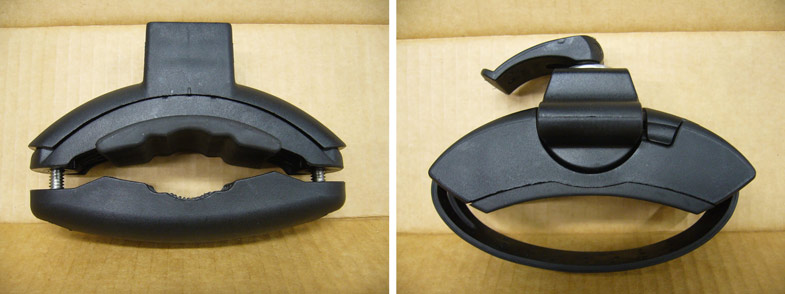
When Yakima revamped its entire roof-mounted accessories line last winter, it was easy to overlook their innovative new hardware for their roof mounted ski carriers. Included with the glossy black Fat Cat 4 and Fat Cat 6 models, as well as the WB300 under Yakima's Whispbar line, the new hardware is referred to as SnapLock? hardware and is comprised of 3 pieces: the main body, a washer and what Yakima is referring to as a 'knob and nut handle'.
The biggest change with the new SnapLock? hardware is that it's now tool free; a truly winning feature compared to Yakima's previous hardware that required the use of a hex (or Allen) key to mount the assembly to your roof. The SnapLock? hardware uses a steel belt coated in rubber and a rubber base to attach to the cross bars of your choice without damaging them. The hardware fits aerodynamic load bars to a maximum of 88mm long x 44mm wide with a minimum width of 16mm. The other great thing about the new hardware is that once it's set up to fit your car you never really have to adjust anything ever again (at least until you switch vehicles).
Yakima did keep the previous carrier's ability for the hardware to pivot. This pivot action allows the ski carrier to be mounted level or as near level as possible on your cross bars, which is by far the best feature of Yakima open-air ski carriers.
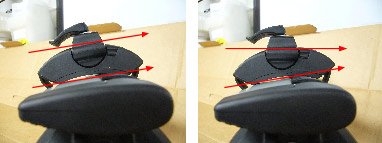
We here at Rack Attack were quite impressed with the new hardware and welcomed the improvements. To maintain the life expectancy of the hardware it is best to lubricate the threaded bolt that tightens the steel belt with white grease or silicone based lubricants after the winter. This will help prevent the bolt from rusting and seizing on your crossbars. We also recommend removing the carrier after the winter months, as it will not be in use.
To mount the hardware first take the SnapLock? hardware and ski carrier (FatCat or WB300) and thread the small length of bolt through the available hole in the ski carrier. On the inside of the ski carrier place the included washer over the bolt then thread the knob with nut handle around the bolt do not over-tighten - just install this loosely.
Next, install the ski carrier onto your crossbars and wrap the belt under your cross bar hooking the flip tab on the end into its seat position.
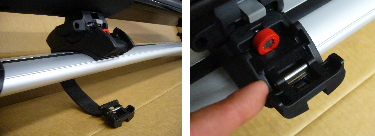
Now tighten or loosen the red wheel as needed (lefty loosy, righty tighty) to adjust the tension on the belt. The belt should be taut enough so when you flip the tab on the end of the belt it snaps in place and the mounting hardware cannot be moved on the load bar.
Return to the knob and nut on the inside of the ski carrier. Tighten the knob enough so that when you flip the handle down you need to give it a little extra push around the halfway point of folding. Folding the handle down pulls internal hardware up, preventing the pivot from moving and engaging the grey tab to lock the belt latch in place. Once the grey tab is engaged on both sets of hardware the ski carrier should be properly installed on your load bars.
